Friday, December 28, 2012

Broccoli with Lemon Almond Butter

How was your holiday season?  We had a wonderful time!  First we visited my mom for Thanksgiving and my M-I-L came as well, which was great!  I love when we get to have both sides of the family together for a holiday.  Then we drove to Wyoming to my dad's place for Christmas. 

My stepmom had the house decked out so beautifully.  Isn't this just the most picture-perfect Christmas shot? 
Yes, we are spoiled rotten.  Now that there are 8 grandkids in the family that adds up to quite a few presents under the tree!
Both of my sisters and their families were there.  I love watching the kids play together now that they are all a bit older.  We had tons of fun and tons of FOOD.  In fact, I pretty much pigged out the whole time I was there....and since it was freezing the entire time we were there my workouts consisted of going up and down the stairs a few times a day. I mean, it's beautiful, but would you go for a run in 5 degree weather?


Needless to say, by the time we got home I was ready for some lighter fare and a long workout!  I hit it hard at the Y today with a HIIT run and some lifting.  It felt great to get a little break from the kids and get the blood flowing. 

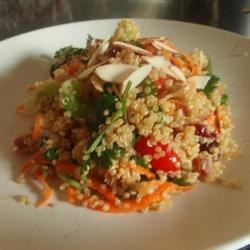
This recipe is a yummy side dish and really fit the bill.  It would be nice with some grilled shrimp on the side for a nice, light, dinner.
 
 
source
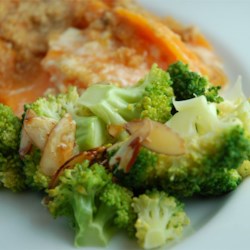
1 head fresh broccoi, cut into florets
1/4 c. butter, melted
2 Tbs. lemon juice
1 tsp. lemon zest
1/4 c. slivered almonds

Steam or boil broccoli until tender, approximately 4 to 8 minutes. Drain.
 
In a small saucepan, melt butter over medium low heat. Remove from heat. Stir in lemon juice. lemon zest, and almonds. Pour over hot broccoli, and serve.  Feel free to adjust the amount of sauce used to taste. 

Thursday, December 27, 2012

Top 10 Recipes of the Year

Now that all of the holiday madness is over I thought I'd do a little recap of the most-viewed recipes of 2012.  Here goes!

The first is the absolutely delish Best Chicken EVER!  Don't let the bizarre mix of ingredients turn you off, this stuff is amazing! 
 
Looking for light, fluffy, sweet pancakes you can make with pantry staples?  Look no further.  Best Ever Pancakes will fit the bill.


Italian Roasted Asparagus is an amazingly easy side dish for just about any meal.


Another one of our favorites that makes a great breakfast or afterschool snack, Blueberry Creme Muffins.


Go brush the snow off your grill; you'll want to try my Best Ever Steak Marinade.


Tacos in Pasta Shells are a great, family friendly dinner.


My Great Aunt Tommie's Chocolate Cake came in number one in the dessert category.  Serve with a glass of milk, it's RICH!

Whip up a batch of my friend Dawn's soft and chewy caramel corn for your Superbowl Party!
Another great dinner you can whip up in a few minutes on a busy weeknight, Spinach Tomato Tortellini

And last, but not least, if you're tired of cocoa and apple cider, give this yummy recipe to make Masala Chai tea a try.


Saturday, October 20, 2012

Autumn Quinoa with Yams and Mushrooms

I am absolutely loving yams right now!  They are chock full of good vitamins, warm and sweet, and just scream fall.  I found this recipe on All Recipes, link below the picture.  It's a wonderful vegetarian dish that is rich in protein and other good for you vitamins. Be sure to rinse the quinoa well before you cook it to ensure you remove all of the bitterness that is a natural part of the grain.  You could substitute any kind of mushroom that you like.  Sweet potatoes would give a similar flavor if you can't find yams.  I suggest using yams though.  They give a wonderful color to the dish and are rich in beta carotene (vitamin A). 


1/3 cup quinoa
 

Monday, October 8, 2012

Curried Roasted Butternut Squash Soup


This is a great fall soup.  I like it for a lunch or a light dinner with some crusty bread.  It's easy to make vegetarian by using vegetable broth rather than chicken.  Personally, I like the richness the chicken broth gives it.  You could use sour cream instead of yogurt if you like.  You could even prep the recipe, let the veggies cook down in the slow cooker and puree when you are ready to eat.  You can find the original recipe here.
 
1 butternut squash, halved and seeded

Preheat oven to 350 degrees F (175 degrees C). Line a baking sheet with parchment paper or aluminum foil.

Place squash halves and onion onto the prepared baking sheet. Wrap garlic in foil and set with other vegetables.

Roast in the center of the oven for 45 to 60 minutes, until the squash is tender. Remove from oven and set aside until cool enough to handle.

Squeeze garlic cloves out of their skin like paste into a food processor. Scrape the flesh from the squash and place into the food processor along with the roasted onion. Puree until smooth. Add vegetable broth if necessary. Transfer the pureed mixture to a stockpot and stir in vegetable broth. Season with the bay leaf, brown sugar, curry powder, oregano, cinnamon, nutmeg and salt and pepper to taste. Bring to a boil and simmer gently for 10 minutes. Remove from heat and stir in yogurt.

Remove bay leaf and serve hot. Garnish with fresh parsley if desired.

Saturday, October 6, 2012

From Scratch- Pumpkin Crescent Rolls


Ah, fall is in the air!  Don't you just love autumn?  It is by far my favorite season.  The heat of summer is over and the air feels crisp and clean.  There are still flowers in the garden, and the leaves on the trees are adding their beauty to the season.  I love pulling out my cute boots, scarves and sweaters.  In my opinion there just isn't anything to not like about fall!

We've been having a fairly busy few weeks.  My awesome hubby is almost done with his graduate program and we are getting so excited/nervous to see where the road of job-hunting will take us in the next year.  We've narrowed down our list of "ideal" places to a top-10.  Hopefully one of those will have a position available for him.  If not, we'll cast the net a bit wider. 

My new preschool is going really well.  We had an awesome fieldtrip to a local organic farm and it was by far the coolest fieldtrip I've ever taken a class on.  They use horse-drawn plows and harvest and plant most things by hand.  The kids got to pick pumpkins, tomatoes, kale, lettuce, beans, gather walnuts, pet goats and cows and so much more!  It was a great learning experience for them to see where their food comes from and how much hard work and dedication goes into putting food on our tables.

Another favorite thing about fall to me is the wonderful seasonal flavors- pumpkin, nutmeg, apples, squash.... I found this great pumpkin recipe on one of my favorite blogs, Money Saving Mom. and just had to share.  This blog is a great resource for savings in just about any area of your life. What I love the most about it though is that she makes so many things from scratch which, though they do take more time, are much easier on your wallet and healthier for your family. She has many GF recipes and freezer recipes for those of us that like to plan ahead.  The recipe and all photos are from MSM.

  • 1 ½ cups pumpkin puree (canned or homemade), slightly warmed
  • ½ cup warm water
  • 4 T sugar
  • 3 T softened butter, cut into pieces
  • 2 eggs
  • 1 t salt
  • 4 cups all-purpose flour*
  • 1 ½ cups whole wheat flour (or use additional all-purpose flour)
  • 1 package instant active dry yeast
  • 3-4 additional T softened/melted butter, divided
*Depending on the kind of pumpkin you use, you may need a little more flour than this. Start with this amount, and check your bread machine after the initial mixing (most bread machines “beep” at the end of this time), adding more flour if necessary.

Directions:
In a 2-lb bread machine, add all ingredients in the order listed (except additional butter), or in the order recommended by your specific bread machine. Run the short dough cycle.
On a lightly floured surface, divide dough into 2 pieces. Roll each into a 12-inch circle. Brush with 2-3 tablespoons additional butter. Cut each circle into 10-12 wedges.
 
Starting at long end, roll each wedge to the tip of the dough and pinch to seal. Place on greased cookie sheets and let rise in a warm place for 30 minutes.

 
Bake at 375 for 12 minutes, or until starting to brown. Brush with remaining melted butter.


Wednesday, September 12, 2012

Just a quick post today.  I came across this and thought it was perhaps the most useful chart I've ever seen when it comes to cooking!  I hope you find it useful, too.

Thursday, September 6, 2012

Fresh Corn Tomato Salad

Ah, what a busy busy week!  If you read this blog regularly you know that this summer I've been in the process of opening my own preschool out of my home.  Well, Monday was our first day and phew, I'd forgotten how busy a room full of 4 year olds can be!  I even took a nap with my daughter that afternoon and I NEVER nap, so that's saying something.  I am absolutely loving teaching again, and being in my own "classroom" where I can teach whatever I want!  And it's great for my kids too, because I know they are getting a top notch education, but also getting the socialization that many homeschooled kiddos lack.  Now, please don't send me nasty emails about how not all homeschool kids are socially behind.  I know many homeschooled children are very social and their parents go above and beyond.  But for me, I know my kids and I know that they are happiest in a school environment with other children. 

Since my last few posts have been pretty decadent I thought I'd throw something at you on the lighter side.  It's corn season here and what could be better than a quick salad of corn fresh off the cob and other veggies from the garden?

Picture of Fresh Corn Tomato Salad Recipe
 
This recipe is from "How to Boil Water" on the Food Network.  You can find the orignal here.  It would also be yummy with feta cheese in place of the mozzerella.  Or, oh, how's about a smoked mozzerella!  My mouth is watering, better whip up another batch :)
 
 
3 tablespoons white wine vinegar
2 teaspoons kosher salt
Freshly ground black pepper
1/4 cup extra virgin olive oil
6 ears fresh corn, husked (about 4 cups corn kernels)
2 cups grape tomatoes, halved
1 bunch scallions (white and green), thinly sliced
8 ounces fresh mozzerella cheese cut into small cubes
1 1/2 cups fresh basil leaves

Whisk the vinegar, salt, and pepper in a small bowl. Gradually whisk in the oil, starting with a few drops and then adding the rest in a steady stream, to make a smooth dressing.

Shear off the corn kernels with a sharp knife over a bowl. Toss in the tomatoes, scallions, and mozzarella. Pour the dressing over the salad and toss to coat. Cover and let set for 15 minutes or up to 2 hours. Before serving tear the basil over the salad and stir.
 

Thursday, August 30, 2012

Banana Bread Bars w/ Browned Butter Frosting

Oh my heavens! These are the best bars ever!  Is what I said to myself when I first made these bars, the recipe for which I found on Life's Simple Measures.  I will never again make banana bread to use up old bananas, and once you try this, neither will you.  Browned butter does something absolutely magical when mixed with the creamy flavor of bananas.  Ahhh..... the only change I might make next time is I want to try browning the butter that goes into the batter first.  A one-two punch of browned butter?  I think YES!


I liked these bars so much that they are what I chose to enter in our county fair this year and I won a BLUE ribbon!  Woot! I won another blue ribbon for my Dark Chocolate Cherry Brownies.  Now, stop reading this blog and start making these bars :)

Banana Bread Bars:
1-1/2 c. sugar
1 c. sour cream
1/2 c. butter, softened
2 eggs
1-3/4 c. (3 or 4) ripe bananas, mashed
2 tsp. vanilla extract
2 c. all purpose flour
1 tsp. baking soda
3/4 tsp. salt
1/2 c. chopped walnuts (optional)
Brown Butter Frosting:
1/2 c. butter
4 c. powdered sugar
1-1/2 tsp. vanilla extract
3 tbsp. milk
Heat oven to 375F. Grease and flour 15x10-inch jelly roll pan. For the bars, in a large bowl, beat together sugar, sour cream, butter, and eggs until creamy. Blend in bananas and vanilla extract. Add flour, baking soda, salt, and blend for 1 minute. Stir in walnuts.
Spread batter evenly into pan. Bake 20 to 25 minutes or until golden brown.
Meanwhile, for frosting, heat butter in a large saucepan over medium heat until boiling. Let the butter turn a delicate brown and remove from heat immediately. Watch the butter closely!  The TURN happens quickly, and you don't want to burn your butter!!
 
Add powdered sugar, vanilla extract and milk. Whisk together until smooth (it should be thicker than a glaze but thinner than frosting). Using a spatula, spread the brown butter frosting over the warm bars (the frosting will be easier to spread while the bars are still warm).

Yield: 2 dozen large bars

Monday, August 27, 2012

Catching up and More Brownie Heaven- Coconut Macaroon Brownies


Hello!  Wow, have I been slacking on the blog.  And just when I was about to get a little following! I'm sure that's breaking blogging rule numero uno, but I really do have good reasons, I swear!  Most importantly my furniture business has taken off this summer.  I paint antique furniture as a little side business.  You can see my work here.  When it's nice out it's so great to paint.  The paint dries quickly and my teeth aren't chattering!

We've gone on a couple short trips and had some visitors here as well.  One of my favorite parts of summer is visiting family.

I've also decided to open a preschool at my home this fall.  I just wasn't happy with the school my daughter was going to last year, and it's pretty slim pickin's around here.  So, since I have a Master's in Early Childhood Ed, I figured why not just homeschool her?  I wanted her to have all the socialization that comes with preschool, though, so I got together with a couple of other dissatisfied parents from Big Sister's school and opened my own little "Roots and Wings Preschool"!  I'm really excited about it.  Our first day is coming up next week and I've been busy planning activities, tracking down packages of curriculum lost in the mail and just generally getting things ready.

My husband's graduate program is almost done! Yay! I will be so relieved and so will he, when the classes are done and his intern hours are complete.  Then we have the exciting/scary/stressful job of looking for an admin position for him and possibly moving!  Gah!  I'm trying not to think about all the big changes coming up in our lives and just focus on my kids and our family and what we're doing day to day.

One of the things I have made sure to make time for in my schedule is BROWNIES!  And here's another great recipe for you.  Enjoy!


1 cup butter, softened
2 cups sugar
4 eggs
1 1/2 teaspoons vanilla extract
2 cups all-purpose flour
3/4 teaspoon cream of tartar
1/2 cup unsweetened cocoa powder
1/2 cup chopped walnuts
4 cups unsweetened flaked coconut
1 (14 ounce) can sweetened condensed milk
1 tablespoon vanilla extract
        
Preheat oven to 350 degrees F (175 degrees C). Grease and flour a 9x13 inch baking pan.               
In a large bowl, cream together the butter and sugar. Beat in the eggs, one at a time, then stir in 1 1/2 teaspoons vanilla. Combine the flour, cream of tartar and cocoa; stir into the egg mixture until well blended. Fold in walnuts. Spread half of this mixture into the bottom of the prepared pan.               
Make the middle layer. In a medium bowl, stir together the coconut, sweetened condensed milk and 1 tablespoon vanilla. Carefully layer this over the chocolate layer in the pan. Top with the remaining chocolate batter. Spread to cover evenly.               
Bake for 45 to 50 minutes in the preheated oven, until top is no longer shiny. Cool in the pan before cutting into bars.

Friday, July 27, 2012

Pork Roast with Sweet Potatoes

This is such a great slow cooker recipe, traditional with a unique twist to keep it interesting.  It's also a great dish to serve to company.  Since it's thrown in the crock pot in the morning, all you'll need to do while the guests are there is throw together a salad to serve on the side.  Better yet, put those guests to work and get everyone chopping in the kitchen! :)

This recipe was adapted from one in  Not Your Mother's Slow Cooker: Family Favorites which is one of my all-time favorite cook books because everything is delicious and nothing comes out of a can.  Don't skimp on the candied ginger in this dish, it really takes this dish to the next level.  You might also want a loaf of nice crusty bread to soak up all the yummy juices!

Slow Cooker Garlic Pork Roast and Sweet Potatoes

2-3 large sweet potatoes, peeled and cut into chunks
3 med. carrots, cut into chunks
3 small sweet onions, quartered
1 3-4 lb. pork loin roast, trimmed of fat and tied with twine
1 tsp. dried oregano or marjoram
1/4 tsp. garlic powder
salt and pepper to taste
1/2 c. apple cider or apple juice
1/4 c. chicken broth
3 Tbsp. brown sugar
2 Tbsp. chopped crystallized ginger

Coat the inside of your slow cooker with cooking spray and add the vegetables.   Rub the roast with oregano, garlic powder, salt and pepper.  Nestle it down into the veggies.  Combine all remaining ingredients except ginger and pour over the roast.  Sprinkle the ginger on top.  Cover and cook on low 8-9 hours or high 4-5 hours. 

Transfer the roast to a platter and cover with aluminum foil.  Let stand for 10 mins to let the juices settle.  Remove the twine and carve the roast into thick slices.  Serve with vegetables and juices from the crock.  

Tuesday, July 17, 2012

Peach Raspberry Pie

This is my go-to summer pie.  It has all the flavors of summer and is equally good nice and cold from the fridge or hot from the oven with a little vanilla icecream.  You can find the recipe for my no-fail pie crust recipe here.


Peach-Raspberry Pie

4 c. peaches, peeled and chopped
1 c. raspberries
3/4 c. sugar
3 Tbsp. flour or cornstarch
1 tsp. cinnamon
2 Tbsp. butter
2 pie crusts (to make one double crust pie)
1 Tbsp. sugar for topping

Preheat your oven to 400.  Roll out first pie crust and place in bottom of pie pan, trimming edges as needed.  Place the fruit in a colander for 15 min. to drain any excess liquid.  Transfer to a bowl and toss with sugar, flour or cornstarch, and cinnamon.  Fill pie crust, dot with 2 Tbsp. butter and top with second crust.  Flute edges as desired and be sure to cut a few vents in the top to allow steam to escape.  Sprinkle 1 Tbsp. sugar over crust and bake for 45 mins.  Keep an eye on the crust.  You may need to cover the edges with a strip of aluminum foil to keep them from overcooking.

Monday, July 16, 2012

Black Eyed Pea Salad with Lemon Vinaigrette

No, I have not fallen off the face of the earth.  Yes, I have been crazy busy!  We've been swamped with swimming lessons and soccer practice, not to mention a 10 day trip to my dad's ranch in Wyoming over the 4th of July.  This trip was the first time I traveled for any extended amount of time with my two kids by myself.  My husband had to work, so I loaded up the van (thank God for mini-van's with DVD players!  How did our parents do it?!?) and hit the road.  We had a really nice visit.  The first few days I got to spend with my dad, which was a real treat.  We rarely get one-on-one time together; our family is so darned big!  My step-mom showed up a couple of days later after a volunteering trip she'd been on, and my younger sister rolled in the next day with her little boy.  He wasn't too sure about me on this visit. He finally decided I wasn't the boogie man about 10 minutes before we headed back home. 

We had a little BBQ get together with some of the extended family and I whipped up this quick bean salad which I adapted from this recipe from the Liv Life blog.  It was so light and fresh.  A perfect accompaniment to ribs :)


Dressing:
¼ cup fresh squeezed lemon juice
1½ Tbs Olive Oil
7 leaves fresh cilantro, thinly sliced
1 clove of garlic, pressed
zest of one lemon, finely grated
1 tsp mustard
salt and pepper to taste

Salad:1 can black eyed peas, drained and rinsed
½ cup chopped tomato
1 avocado, diced
2 green onions, finely chopped

In a small bowl mix the dressing ingredients together, whisk until well blended.

In a large bowl mix together the salad ingredients. Add the dressing and toss lightly to coat evenly. Add salt and pepper to taste, and serve!


Saturday, June 16, 2012

Black Bean Fiesta Pasta Salad

Last night we camped in the backyard with the kids for the very first time.  We tried last summer when Little Brother was only one and it resulted in lots of grumbling on the part of the parents and fussing on the part of the kids.  We ended up sleeping in our beds that night.

Last night was amazing though!  We slept in our hobbitat tent, which we love because it has an amazing celing that lets you see all the stars.  We sang twinkle twinkle, and Big Sister learned the "Star Light, Star Bright" poem.  We shared our wishes and read lots of books.  It took a bit of time before Little Brother finally settled down, but we slept well and the kids actually slept in later than they do in their dark bedroom! 

Before we snuggled into our sleeping bags I made us a light supper of grilled chicken and this pasta salad.  For our chicken I just used a sundried tomato vinaigrette dressing as a marinade; letting it sit for most of the day in the fridge soaking up all those good flavors.   This pasta salad is nice and light, with bright flavors.  The kids weren't huge fans, being picky as ever, but my husband and I sure liked it! 


2 c. shell pasta, or shape of your choice
4 oz. grape tomatoes, halved
1 avocado, peeled and diced
1/3 c. red onion, diced
1/2 c. yellow or orange bell pepper, diced
1 15 oz. can black beans, rinsed adn drained
4 tablespoons chopped fresh cilantro
2 tablespoons olive oil
4 tablespoons lime juice
1 tsp. salt
ground black pepper to taste
1/2 c. asiago cheese, grated

Cook pasta following package directions.  Drain and rinse in cold water.  In a large bowl ently combine your vegetables, making sure not to smoosh up the avocado too much.  In a small bowl whisk together the cilantro, olive oil, lime juice, salt and pepper.  You can add some cayenne or hot sauce here if you'd like a little heat.  Gently toss pasta with vegetables and dressing until coated.  Chill for 4 hours.  Top with asiago cheese just before serving.  Serves 6.

Friday, June 15, 2012

3 Ingredient Peanut Butter Cookies

My friend Katie made these cookies the other day when we got our kids together for a play date.  Now, I've never liked peanut butter cookies.  They always seemed dry and almost a bit burnt tasting to me.  I always want them to be creamy and rich- like peanut butter is!  These cookies, however, are nothing like those dry cardboard cookies I remember.  They are soft, chewy, silky smooth and peanutty.  I asked her for the recipe and was so surprised at how easy they are!  Only 3 ingredients!! I made a batch at home and they only lasted a couple of days.  I simply could not stop eating them!  I'm pretty sure you could make them with any nut butter, and next time I'm going to try it with Nutella.  I'm sure they'll be TO DIE FOR!


1 c. peanut butter
1 c. sugar
1 egg

Preheat oven to 375 degrees.  Mix ingredients together in a bowl.  Roll into 1-2 inch balls.  Place balls on a cookie sheet and use a fork to press a criss-cross pattern in the center of each cookie, flattening them into disks.  Bake for 8-10 mins watching them carefully!  They burn easily and there is a very fine line between raw, done, and overdone.  IMPORTANT:  Leave them on the cookie sheet a full 10 mins. before removing to let them cool or you will have peanut butter crumbs.  Once they are cool, eat with reckless abandon. :)

Wednesday, June 13, 2012

Herbed Potato and Green Bean Salad

I served this yummy twist on potato salad at my daughter's birthday party.  It was a big hit.  We kept the menu simple with burgers for the grown ups and hot dogs for the kids, with all the fixings, including lettuce from my girlfriend Katie's garden.  I had 3 salads:  fruit salad, a zesty black bean salad, and this one.  We also had salsa and guac with chips, and friend Tara brought a yummy veggie tray with the best radishes!


The original recipe for this salad comes from Taste of Home and I twisted it a bit to give it a bit more color and fresher flavor. Don't skimp on the fresh herbs in this recipe if you can help it.  It really makes a difference in flavor and the look of the final dish. I hope you give it a try at your next summer get together!

1-1/2 pounds small red potatoes, quartered
1 garlic clove, peeled and halved
2 cups cut fresh green beans (1-1/2-inch pieces)
1 can (14-1/2 ounces) chicken broth
1 container cherry or grape tomatoes, halved

Tarragon Dressing:
3 tablespoons olive oil
3 tablespoons apple cider vinegar
1 garlic cloved, minced
1 tablespoon minced fresh parsley
1-1 1/2 tsp. minced fresh tarragon
1/2 tsp. ground mustard
1/2 tsp. salt
1/4 tsp. pepper
1/4 tsp. creole or cajun seasoning

In a saucepan, cook potatoes and garlic in boiling salted water for 5 minutes. Add beans; cook 10-14 minutes longer or until vegetables are tender. Drain; discard garlic. Place vegetables in a bowl.

The original recipe says to warm the broth; pour over beans and potatoes. Cover and refrigerate for at least 2 hours, stirring several times.  I found that this made the green beans taste canned and gave them that yucky brown flavor.  So, I would suggest separating the beans from the potatoes and chilling them separately.  Definitely soak the potatoes in the broth though.  It gives them tons of flavor and keeps them from soaking up all of the dressing later.

In a small bowl, combine oil, vinegar and seasonings; mix well. Drain potatoes.  Add the green beans and tomatoes to the bowl.  Add dressing and toss to coat. Yield: 6-8 servings.


Monday, June 11, 2012

A Birthday

Hi!  I'm back! Man, what a crazy crazy start to summer it's been around here.  We've had guest after guest from all corners of the country, the end of the school year, internships, projects, swimming lessons, summer reading, 5ks,  etc, etc, etc.  But, I am attempting to get back to my blog, as hard as it is to be inside on the computer when it's sunny out :)

The biggest event of the past few weeks was my daughter's 4th birthday party.  Her special day fell on Memorial Day this year, so we had a combo party and bbq.  It was a lot of fun!  We set up the badminton net, had good eats and brews and even some yummy girly drinks courtesy of my friend Tara!  Thanks Tara!  And Tara, my next post will have that potato salad recipe, just for you!


My beautiful birthday girl!

She got some new wheels!


Here's a pic of Big Sister's "My Little Pony" cake. This was the easiest birthday cake I've created so far and she loved it! It was chocolate strawberry and we just barely had enough for everyone! Phew!


It was so simple to make.  I took a basic chocolate cake recipe, or you could use a cake mix, and cooked it in two round cake pans.  Once they were totally cooled I spread the bottom layer with strawberry jam before adding the top layer.  I like doing this with layered cakes rather than using frosting.  It cuts the sweetness a bit and gives it an extra little something.  Then I frosted with strawberry flavored frosting in a can, which my daughter begged for!  Then I sprinkled the entire cake with pink sugar crystals and decorated with these adorable 3d edible butterflies and flowers that I found at a craft store (Hobby Lobby??)  Then we added her favorite pony, "Rainbow Dash" (favorite because she's a PEGASUS!!!) and finished it off with candles.  I tell you what, making a themed cake this way by sticking a toy on top is soooo much easier than the purple dinosaur and green alligator with babies I made last year for their birthdays:


You can find directions for the crocodile cakes at here.  To make the cupcakes we just frosted them with the same green frosting, cut the apple rings in half and added smaller versions of the marshmallow eyes.
I love making fun cakes for my kids' birthdays.  They are fun, creative, challenging at times, and best part-the kids love them.  I love that something as simple as a birthday cake can be such a labor of love, a real gift from the heart.  Making food that makes people smile and creates memories is why I love to cook!


Monday, May 28, 2012

SWAMPED!

Yes, I am still here. I have just been uber-swamped with projects, cold bugs and planning my daughter's birthday party which is today.  I'll have pics and recipes of the event up soon!  :)

Saturday, May 19, 2012

Antipasto Pasta Salad

Wow!  The weekend is only half over and I feel like I've accomplished so much! Don't you just love days like that?  I feel especially awesome because my husband was gone all morning at an archery competition so I was on kid-duty as well.  Luckily Big Sister played at the next door neighbors all day and Little Brother was kept busy with the garden hose for a looooong time, allowing me to work my butt off. Here's a little rundown of my day:

1. Ate breakfast with the kids, read our new library books again, then they watched cartoons while I drank some coffee and read my magazine, and had a nice chat with my mom ♥
2.  Did 2 loads of laundry and it's all put away!
3.  Cleaned all of the floors in the house
4.  Cleaned the laundry room that looked like it was right out of an episode of Hoarders.  Seriously, I should have taken before and afters.  While I did that I also got all of my sewing supplies and fabric stash organized- something I've needed to do for a loooooong time.
5.  I prepped and put 2 coats of paint on a furniture project I'm working on.  Did you know I also custom paint furniture?  You can see my work at Pierce Street Furnishings. I'm really excited about this because it's my last project to wrap up for my first booth at the local consignment and antique mall.  They are having an outdoor sale and I rented a booth for the weekend.  If the sale goes well I might consider renting a booth inside their shop to sell my wares :)

It feels great to have all of this accomplished and know that a lot of my not-fun things are crossed off of my list so tomorrow I'm free to do lots of REALLY fun things! Like grilling out and eating this delicious pasta salad :)

1 pound corkscrew pasta
1/4 pound Genoa salami, chopped
1/4 pound pepperoni sausage, chopped
1/2 pound Asiago cheese, diced
1 (6 ounce) can black olives, drained and chopped or fresh pitted kalamata olives
1 jar artichoke hearts
1 red bell pepper, diced
1 green bell pepper, chopped
3 tomatoes, chopped
1 (.7 ounce) package dry Italian-style salad dressing mix- look for a low sodium one
3/4 cup extra virgin olive oil
1/4 cup balsamic vinegar
2 tablespoons dried oregano
1 tablespoon dried parsley
1 tablespoon grated Parmesan cheese
salt and pepper to taste

Cook the pasta in a large pot of salted boiling water until al dente. Drain, and cool under cold water.

In a large bowl, combine the pasta, salami, pepperoni, Asiago cheese, black olives, red bell pepper, green bell pepper and tomatoes. Stir in the envelope of dressing mix. Cover, and refrigerate for at least one hour.

To prepare the dressing, whisk together the olive oil, balsamic vinegar, oregano, parsley, Parmesan cheese, salt and pepper. Just before serving, pour dressing over the salad, and mix well.

Friday, May 18, 2012

Dark Chocolate Cherry Brownies

I know you can't tell by the title of this post, but I've been really kicking up my healthy habits lately.  I've cut caffeine almost entirely out of my diet, along with the cream and sugar that goes with it.  I've been devouring fruit and whole grains, cutting more meat out of my diet and trying to stay away from sweets.  I'm also back into a regular exercise habit, working out about 5 days a week, either running or yoga.  I'm feeling great, sleeping wonderfuly and feeling much more even-keel emotionally since I said bye bye, caffeine.  

So, you can imagine my surprise when I stepped on the scale the other day and had GAINED 3 lbs.  Now of course, I'd like to think that I gained 3 lbs of muscle in the past few weeks, but I just don't know if I believe that.  I thought, maybe I'm just bloated...

2 days later, the number when up another half a pound.  What the hey!?  Now, I know a 3 lb. gain is not that big of a deal, and I don't want to come across as one of those women that obsesses about their weight, because I really don't.  If I feel good, work out and eat well I figure my body will find the place it needs to be to work optimally.  It is a bit of a bummer though to see those numbers creep up when you expect them to go down.  So, what's a girl to do?  Make brownies, of course!  Now I know this doesn't make any sense at all, but I've learned in the past that if I gain a bit and then OBSESS trying to lose it I am miserable and don't lose an ounce.  If I just say, oh well, and continue my healthy habits I always end up back where I need to be without all the stress and guilt.  So, yes.  I want to lose weight.  I am eating brownies. :)


This particular recipe comes from Baking Obsession and I like it not only because it is delicious, but also as far as desserts go it's got a lot going for it health wise.  Walnuts are a terrific source of heart-healthy fats and dark chocolate and cherries are both high in antioxidants.  Add that to the mood boost you get from eating delicious food that you made yourself, and what could be better?


6 tbsp (3/4 stick) butter, salted or unsalted
8 oz bittersweet or semisweet chocolate, chopped
¾ cup sugar
1 tsp pure vanilla extract
2 large eggs
¼ cup flour
¼ tsp salt
1 cup toasted and chopped walnuts (or other nuts)
1/3 cup dry cherries, chopped
1/3 cup dark chocolate chips


Preheat the oven to 350 degrees. Butter a 9-inch square cake pan and line the bottom with parchment paper.

Melt the butter in a medium-size saucepan. Add the chocolate to the butter, stir over low heat until melted.Remove from the heat and stir in the sugar and vanilla. Beat in the eggs, one at a time.

Add the flour, and salt and stir energetically for 1 minute, until the batter loses its graininess and becomes smooth and glossy.  (*This is an important step, unlike most brownies you need to really incorporate these ingredients.)

Stir in the chopped nuts, cherries, and the chocolate chips. Scrape the batter into the prepared cake pan and bake for 30 minutes. Cool completely before removing the brownies from the pan.

The brownies will keep well for up to 4 days (though  I'd never know....) at room temperature.

Tuesday, May 15, 2012

Fresh Mango Salsa

My current fruit obsession has moved on from strawberries to mangos.  Has anyone else noticed how delicious they are this time of year? It's finally gotten HOT here, today is our first day in the 90s and I've been working in the yard a ton.  It's so nice to come in and snag one of these refreshing little babies out of the fridge and eat it nice and cold.  If you're not sure how to choose, store or slice your mangos, you can find all of that information here.  And be sure to visit my facebook page to learn about the great health benefits of mangos.

I also like to make mango salsa in the summer time.  It's delicious served with chips or over grilled chicken, or wrapped in a pita with some arugula and roasted turkey for a quick lunch.  This recipe for Mango Salsa comes from Make it Naked.  You can find the original here.  I love the addition of the avocado... it makes it sort of a guac/salsa fusion and it's delicious!  Don't you want to just stick a fork into your computer screen??


1 mango, diced
1 avocado, diced
1 tomato, diced
1/4 red onion, diced
1/2 jalapeno, seeded and diced
1/4 cup cilantro, chopped
1-2 garlic cloves, diced (I used a garlic press)
1/2 tablespoon extra virgin olive oil
1/2 teaspoon kosher salt
Juice of 1 lime

Wash, peel and seed all ingredients where necessary. Chop the mango, avocado and tomato to uniform sized pieces. Chop the rest of the ingredients as necessary.

Combine all ingredients in a bowl and stir to combine. Refrigerate for at least 15-30 minutes.

Saturday, May 12, 2012

Buttermilk Pound Cake

Since it's strawberry season we've been eating a lot of strawberry shortcake around here.  We like to have it on angelfood cake or pound cake rather than those little round storebought shortcakes.  I think those just have a gross texture and taste like chemicals.  This cake is so easy to whip up.   It makes a lot and freezes well.  I like to slice it all up the day I make it and freeze it in ziploc bags.  Whenever you want strawberry shortcake, just pull a slice out and let it thaw for 30 mins or so.  Delish!


3 cups all-purpose flour
1/4 teaspoon baking soda
1/2 teaspoon salt
1 cup butter
3 cups white sugar
6 eggs
1 teaspoon lemon extract
1 teaspoon vanilla extract
1 cup buttermilk

Preheat oven to 325.  Grease one 9 or 10 inch tube or bundt pan. Mix together the flour, baking soda, and salt. Set aside.

In a large bowl, beat butter with sugar. Mix in the eggs, one at time, beating well after each addition. Stir in the lemon and the vanilla extracts. Gently mix in flour mixture alternately with the buttermilk. Pour batter into the prepared pan.               

Bake in preheated oven for 90 minutes. Do not open oven door until after one hour. When cake begins to pull away from the side of the pan it is done. Let cool in pan for 10 minutes, then turn out onto a wire rack and cool completely.

Thursday, May 10, 2012

Warm Lentil Salad

Today was a day to use up leftovers in my fridge.  I had a grilled bratwurst, some grape tomatoes, and green onions that were all on their way out.  So, I threw together this lentil salad.  It's high in protein and fiber, and you could really put whatever you wanted in the bowl.  You could easily make it vegetarian by leaving out the meat or using tofu or eggs in their place. I made a single serving, but I adjusted the recipe to serve 4.


4 cups water
1 cup dry lentils
assorted vegetables: cucumber, grape tomatoes, green onions, carrots, etc.  Whatever sounds good!
left over hardboiled eggs, tofu chicken, sausage or steak cut into bite-sized pieces
Balsalmic Vinaigrette (we like Ken's and Newman's)
salt and pepper to taste
Seeds for garnish (sunflower, flax, hemp, sesame, etc.)

Bring the water and salt to a boil in a saucepan over high heat. Pour the lentils into the water while stirring constantly. Reduce heat to low, cover, and simmer until the lentils are tender but still hold their shape, about 30 minutes. Drain well.         

Meanwhile assemble your veggies and meats.  Cut everything into bite-sized pieces.  I like to warm my meat up as well.  Though if you're using chicken or steak you could chill the entire salad and have a cold lentil salad that would be really refreshing on a hot day.

When the lentils are finished, toss everything in a large bowl.  Drizzle with balsalmic dressing to your liking.  Sprinkle with salt and pepper and seeds.

Wednesday, May 9, 2012

Whole Wheat Seed Bread

I have been trying to be better about making my own bread rather than buy store-bought. It's so much cheaper and I know exactly what's going into it, which I love.  But often times I'll make it and it just doesn't turn out right.  It tastes good, but doesn't make the greatest sandwiches.  And that's what everyone wants, right?  Good sandwich bread!  I've been experimenting with my breadmaker trying to come up with the best recipe for a whole wheat bread that my family will eat.  Many come out too dry or crumbly.  I really wanted to make mine 100% whole wheat, but it just never quite cut the mustard. So finally, I admitted defeat and used a portion of unbleached all-purpose flour.  I hate to say it, but it's so much better.  I add whatever seeds I have on hand.  I usually use hemp seeds because they disappear.  When you have a picky little girl that wants to know, "What are all these THINGS in my bread?!?" if she sees one tiny speck, you learn to get creative with hiding the healthy stuff.  Poppy seeds, sesame seeds, ground flax or even sunflower seeds would be yummy, too.

When it's done I let it cool and then slice up the whole loaf and store it in a ziploc.  I've found the rest of my family is more likely to eat it if it is pre-sliced and therefore easier to use.  Be sure to eat a slice warm with butter.   It's a slice of heaven!

This recipe makes a 1.5 lb. loaf.

1 c. + 2 tablespoon water
1 tablespoon butter
2 tablespoon honey, sugar or agave nectar
1 tablespoon non-fat dry milk powder
1 1/2 teaspoon salt
2 c. whole wheat flour
1 c. all-purpose flour
2 tablespoons seeds
2 1/2 teaspoons bread machine yeast

Add all ingredients to your bread maker in the order listed.  Use the basic or white bread setting.  I use the light crust setting because it's a little less crunchy and seems to slice easier.

Saturday, May 5, 2012

Apple Pie Muffins

I've been trying to stock-pile my freezer lately with some good staples and breakfast items that I can pull out for a quick meal and not have to reach for a can or a box of cereal.  So far I've whipped up a double batch of Best Ever Pancakes, which I froze and stored in a ziploc freezer bag.  Yesterday I made freezer cinnamon rolls from Money Saving Mom.  You can find that recipe here.  I also made a big batch of black beans and froze them in 2 cup portions (about equal to one can of beans) so they will be ready to use whenever we need them.

Today I made these muffins.  When you're ready to eat them, you can either pull them out of the freezer the night before and they'll be defrosted when you wake up, or you can pop them in the microwave for up to 1 min (watch them, they heat up quickly!) and smother them with butter..mmmmm....


2 1/4 cups flour
1 teaspoon baking powder
1/2 teaspoon salt
1 egg
1 cup buttermilk
1/2 cup butter, melted
1 teaspoon vanilla extract
1 1/2 cups packed brown sugar
2 cups diced apples           
1/2 cup packed brown sugar
1/3 cup all-purpose flour
1 teaspoon ground cinnamon
2 tablespoons butter, melted


Preheat the oven to 375.  Grease a 12 cup muffin tin or line with paper muffin cups.               

In a large bowl, stir together 2 1/4 cups flour, baking soda and salt. In a separate smaller bowl, mix together the egg, buttermilk, 1/2 cup melted butter, vanilla and 1 1/2 cups of brown sugar until sugar has dissolved. Pour into the flour mixture and sprinkle the diced apple into the bowl as well. Stir just until everything is blended. Spoon into the prepared muffin tin, filling the cups to the top.               

In a small bowl, stir together 1/2 cup of brown sugar, 1/3 cup flour and cinnamon. Drizzle in 2 tablespoons of melted butter while tossing with a fork until well blended. Sprinkle this over the tops of the muffins.

Bake for 25 minutes in the preheated oven, or until the tops of the muffins spring back when lightly pressed.    

Enjoy them now or let them cool on a wire rack and then freeze in freezer bags.            

Friday, May 4, 2012

Classic Quiche Lorraine and a No-Fail Pie Crust

I'll never understand where the saying "Real men don't eat quiche" came from.  This classic quiche is filled with bacon, eggs, cheese, cream tucked inside a rich pastry.  What's a guy not to love?  This is a really simple, easy dinner to whip up and doesn't cost a lot of money in ingredients.  It's even faster if you have crumbled bacon and pie crusts ready and waiting in your freezer.  I like to prepare these two things in large batches since they are a bit time consuming, freeze them and just thaw when I'm pressed for time.  We had this last night with a quick fruit salad but it would be equally good with a green salad. 

When I make a fruit salad I simply chop all of the fruit into bite-sized pieces.  Then I mix it with just a few squeezes of lemon juice to preserve the color.  Then I add a handful of shredded coconut and maybe some raisins or dried cranberries if I have them on hand.  The coconut and dried fruit gives a nice chewy texture to the salad.

The pie crust recipe that follows is my go-to recipe.  Don't be intimidated by making your own pie crust! It is so simple and the results are so amazing, once you've done it a few times you'll never go back to those store-bought processed crusts.


1 single crust of Rich Butter Pie Crust (recipe follows)
1/2 lb. bacon, cooked and crumbled
1 c. shredded gruyere or swiss cheese
4 eggs
2 cups half & half
1/2 tsp. salt
1/8 tsp. pepper
dash cayenne pepper
dash nutmeg

Preheat oven to 425. 

Line a deep 9" pie dish or quiche pan with pastry and flute the edges as you like.  Sprinkle bacon evenly over the unbaked shell.  Sprinkle cheese evenly over that.  In a large bowl mix eggs, half & half, milk, pepper, cayenne and nutmeg, well.  Carefully pour over the bacon and cheese.  Bake 15 minutes.  Reduce heat to 350 degrees and bake another 25-30 mins longer until a knife inserted near the center comes out clean.  Let stand 5-10 min. before serving.


Rich Butter Pie Crust

This recipe is for a single crust pie.  It is easy to double for a double crust pie.

1 c. flour
1/4 tsp. salt
1/2 cup butter, slightly softened
3-4 Tbsp. cold water

Stir flour and salt together in a medium bowl.  With a pastry blender or fork cut in the butter until the pieces are the size of small peas.  Add the smaller amount of water and toss with a fork until it begins to come together.  If necessary add remaining water to crumbs in the bottom of the bowl.  It is very important to not overwork the dough.  You want the ingredients to stay cool. It may seem a bit crumbly, but that is what makes it oh-so-flaky in the finished dish.  Gather the dough in your hands and press into a ball.  Roll out to desired size, or tightly wrap in plastic wrap then aluminum foil to freeze.

Tuesday, May 1, 2012

Summer Quinoa Salad

If you haven't tried quinoa (pronounced keen-wah) yet, now is the time!  It is a great source of protein for vegetarians as it is a complete protein, meaning that unlike beans and most other protein sources it has all of the amino acids the body needs in one source. It is also gluten-free. It is super easy to cook and can be used just about anywhere you'd use rice.  Even if you aren't vegetarian this is a great pantry staple to have for Meatless Mondays or any time you want a lighter meal.  Because quinoa is protein rich, and a whole grain it is really filling.  Great for those of us looking to shed a few pounds. :)

This salad is yummy and refreshing.  The cranberries give it a pop of color and sweetness and the cilantro is super fresh. If you're not big into cilantro you could substitute another fresh herb.  Basil would be amazing!  I'm allergic to almonds so I use pecans, but I think you could use any nut you had on hand.  I think I might try peanuts next time.  I think they'd really be good with the curry flavor.


1 1/2 cups water
1 cup uncooked quinoa, rinsed
1/4 cup red bell pepper, chopped
1/4 cup yellow bell pepper, chopped
1 small red onion finely chopped
1 1/2 teaspoons curry powder
1/4 cup chopped fresh cilantro
1 lime, juiced
1/4 cup toasted sliced almonds or other nut
1/2 cup minced carrots
1/2 cup dried cranberries
S & P to taste

Pour the water into a saucepan, and cover with a lid. Bring to a boil over high heat, then pour in the quinoa, recover, and continue to simmer over low heat until the water has been absorbed, 15 to 20 minutes. Scrape into a mixing bowl, and chill in the refrigerator until cold.

Once cold, stir in the red bell pepper, yellow bell pepper, red onion, curry powder, cilantro, lime juice, sliced almonds, carrots, and cranberries. Season to taste with salt and pepper. Chill before serving.               
Related Posts Plugin for WordPress, Blogger...