Showing posts with label dessert. Show all posts

Tuesday, February 12, 2013

Top 20 Healing Foods- Dark Chocolate

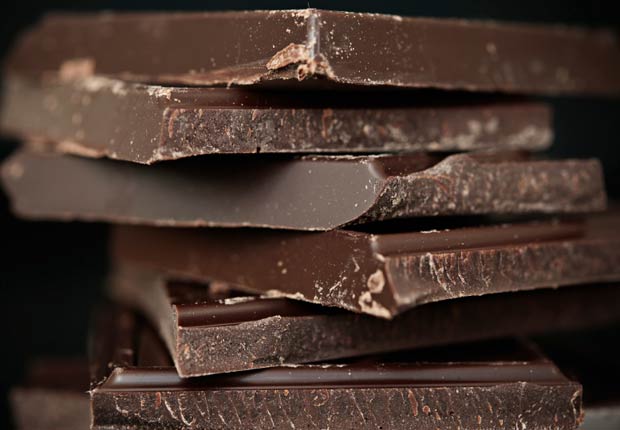
Not many people can say they don't love chocolate.  And isn't it wonderful that more and more studies are showing how wonderful it is for our body?  Dark chocolate (not milk, it is too high in fat/dairy/sugar to fall onto a healthy foods list) is loaded with antioxidants in the form of flavinoids, which are also found in red wine and many fruits and vegetables.  Dark chocolate actually has more flavonoids than any other food! For the most antioxidants look for dark chocolate that contains at least 60% cocoa.  The higher the percentage, the higher the antioxidant punch.  I encourage you to try many different percentages and find the one you like best.  It can take a while for your palate to transition from milk to dark, but your body and your waist line will thank you. 


I like to get my daily dose of chocolate by eating a small amount of dark chocolate chips or a square or two of a good quality dark chocolate.  Because the cocoa flavor is so strong it doesn't take much to sooth my chocolate cravings, and I feel good knowing I'm doing something for my body that feels so decadent!

DARK CHOCOLATE
Key Nutrients:
Potassium
Vitamins A, B1, C, D, E
Iron
Flavonoids

If you want to get a little fancier with your chocolate give this recipe from Pioneer Woman Cooks a go.  It's an easy dessert that sounds, and looks, fancy.  Perfect for impressing dinner guests or your sweetheart on Valentine's Day!

POTS DE CREME


12 ounces semisweet chocolate chips
4 large eggs, at room temperature
2 teaspoons vanilla extract
1 pinch salt
8 ounces (1 cup) very hot strong coffee
1 cup heavy cream
2 tablespoons sugar
 
Place the chocolate chips in the blender. Crack in the eggs, then add the vanilla and the salt. Pulse 5 to 7 times, or until the chocolate chips are partially pulverized.

Turn on the blender, then pour in the very hot coffee through the hole in the top in a steady stream. The coffee will melt the chocolate and turn it into a smooth mixture.

Pour the mixture into small mason jars, pretty wine glasses or demitasse cups. Place the jars on a tray and refrigerate them for 2 to 3 hours, or until firm.

Whip the cream with the sugar and plop it onto the top of each glass.

Tuesday, January 15, 2013

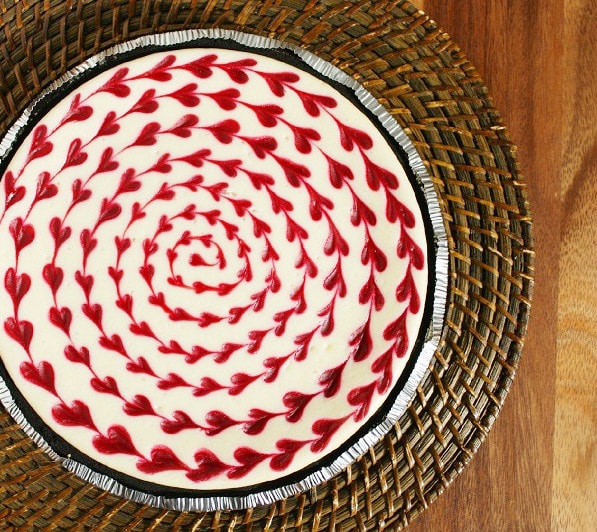
A Valentine's Dessert- White Chocolate Raspberry Cheesecake

I've never really been one to get all gaga over Valentine's Day.  I don't really see the point in making a big deal out of it, or when I was single, feeling sorry for myself if I was alone.  Yes, it's nice to have an excuse to treat our loved ones, but do we need a special date on the calendar to remind us that we should be showing the ones we love how much we care for and appreciate them?  Maybe some folks do.  I guess I should consider myself lucky that I am married to a man that makes me feel loved and appreciated even when the calendar doesn't tell him to. :) 

So, Valentine's Day around here is pretty low key.  Usually we just have a nice dinner and maybe a fancy dessert like the one here.  Almost always we stay in for Valentine's.  Now that we have kids we do fun things as a family like making cards for each other and exchanging little homemade gifts. 

This cheesecake is a real crowd pleaser.  The kids love it, but it's also decadent enough and fancy enough to serve for a romantic candlelight dinner for two, or one!  Single guys and gals, treat yourself!

If you want to recreate the heart pattern on the top simply drag a toothpick or butter knife in a spiral through your raspberry drops to create the hearts.

source

1 cup chocolate cookie crumbs

In a medium bowl, mix together cookie crumbs, 3 tablespoons sugar, and melted butter. Press mixture into the bottom of a 9 inch springform pan.

In a saucepan, combine raspberries, 2 tablespoons sugar, cornstarch, and water. Bring to boil, and continue boiling 5 minutes, or until sauce is thick. Strain sauce through a mesh strainer to remove seeds.

Preheat oven to 325 degrees F (165 degrees C). In a metal bowl over a pan of simmering water, melt white chocolate chips with half-and-half, stirring occasionally until smooth.

In a large bowl, mix together cream cheese and 1/2 cup sugar until smooth. Beat in eggs one at a time. Blend in vanilla and melted white chocolate. Pour half of batter over crust. Spoon 3 tablespoons raspberry sauce over batter. Pour remaining cheesecake batter into pan, and again spoon 3 tablespoons raspberry sauce over the top. Swirl batter with the tip of a knife to create a marbled effect.

Bake for 55 to 60 minutes, or until filling is set. Cool, cover with plastic wrap, and refrigerate for 8 hours before removing from pan. Serve with remaining raspberry sauce.

Thursday, August 30, 2012

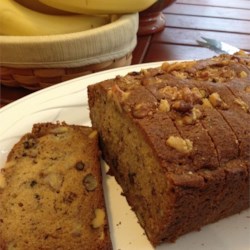
Banana Bread Bars w/ Browned Butter Frosting

Oh my heavens! These are the best bars ever!  Is what I said to myself when I first made these bars, the recipe for which I found on Life's Simple Measures.  I will never again make banana bread to use up old bananas, and once you try this, neither will you.  Browned butter does something absolutely magical when mixed with the creamy flavor of bananas.  Ahhh..... the only change I might make next time is I want to try browning the butter that goes into the batter first.  A one-two punch of browned butter?  I think YES!


I liked these bars so much that they are what I chose to enter in our county fair this year and I won a BLUE ribbon!  Woot! I won another blue ribbon for my Dark Chocolate Cherry Brownies.  Now, stop reading this blog and start making these bars :)

Banana Bread Bars:
1-1/2 c. sugar
1 c. sour cream
1/2 c. butter, softened
2 eggs
1-3/4 c. (3 or 4) ripe bananas, mashed
2 tsp. vanilla extract
2 c. all purpose flour
1 tsp. baking soda
3/4 tsp. salt
1/2 c. chopped walnuts (optional)
Brown Butter Frosting:
1/2 c. butter
4 c. powdered sugar
1-1/2 tsp. vanilla extract
3 tbsp. milk
Heat oven to 375F. Grease and flour 15x10-inch jelly roll pan. For the bars, in a large bowl, beat together sugar, sour cream, butter, and eggs until creamy. Blend in bananas and vanilla extract. Add flour, baking soda, salt, and blend for 1 minute. Stir in walnuts.
Spread batter evenly into pan. Bake 20 to 25 minutes or until golden brown.
Meanwhile, for frosting, heat butter in a large saucepan over medium heat until boiling. Let the butter turn a delicate brown and remove from heat immediately. Watch the butter closely!  The TURN happens quickly, and you don't want to burn your butter!!
 
Add powdered sugar, vanilla extract and milk. Whisk together until smooth (it should be thicker than a glaze but thinner than frosting). Using a spatula, spread the brown butter frosting over the warm bars (the frosting will be easier to spread while the bars are still warm).

Yield: 2 dozen large bars

Monday, August 27, 2012

Catching up and More Brownie Heaven- Coconut Macaroon Brownies


Hello!  Wow, have I been slacking on the blog.  And just when I was about to get a little following! I'm sure that's breaking blogging rule numero uno, but I really do have good reasons, I swear!  Most importantly my furniture business has taken off this summer.  I paint antique furniture as a little side business.  You can see my work here.  When it's nice out it's so great to paint.  The paint dries quickly and my teeth aren't chattering!

We've gone on a couple short trips and had some visitors here as well.  One of my favorite parts of summer is visiting family.

I've also decided to open a preschool at my home this fall.  I just wasn't happy with the school my daughter was going to last year, and it's pretty slim pickin's around here.  So, since I have a Master's in Early Childhood Ed, I figured why not just homeschool her?  I wanted her to have all the socialization that comes with preschool, though, so I got together with a couple of other dissatisfied parents from Big Sister's school and opened my own little "Roots and Wings Preschool"!  I'm really excited about it.  Our first day is coming up next week and I've been busy planning activities, tracking down packages of curriculum lost in the mail and just generally getting things ready.

My husband's graduate program is almost done! Yay! I will be so relieved and so will he, when the classes are done and his intern hours are complete.  Then we have the exciting/scary/stressful job of looking for an admin position for him and possibly moving!  Gah!  I'm trying not to think about all the big changes coming up in our lives and just focus on my kids and our family and what we're doing day to day.

One of the things I have made sure to make time for in my schedule is BROWNIES!  And here's another great recipe for you.  Enjoy!


1 cup butter, softened
2 cups sugar
4 eggs
1 1/2 teaspoons vanilla extract
2 cups all-purpose flour
3/4 teaspoon cream of tartar
1/2 cup unsweetened cocoa powder
1/2 cup chopped walnuts
4 cups unsweetened flaked coconut
1 (14 ounce) can sweetened condensed milk
1 tablespoon vanilla extract
        
Preheat oven to 350 degrees F (175 degrees C). Grease and flour a 9x13 inch baking pan.               
In a large bowl, cream together the butter and sugar. Beat in the eggs, one at a time, then stir in 1 1/2 teaspoons vanilla. Combine the flour, cream of tartar and cocoa; stir into the egg mixture until well blended. Fold in walnuts. Spread half of this mixture into the bottom of the prepared pan.               
Make the middle layer. In a medium bowl, stir together the coconut, sweetened condensed milk and 1 tablespoon vanilla. Carefully layer this over the chocolate layer in the pan. Top with the remaining chocolate batter. Spread to cover evenly.               
Bake for 45 to 50 minutes in the preheated oven, until top is no longer shiny. Cool in the pan before cutting into bars.

Tuesday, July 17, 2012

Peach Raspberry Pie

This is my go-to summer pie.  It has all the flavors of summer and is equally good nice and cold from the fridge or hot from the oven with a little vanilla icecream.  You can find the recipe for my no-fail pie crust recipe here.


Peach-Raspberry Pie

4 c. peaches, peeled and chopped
1 c. raspberries
3/4 c. sugar
3 Tbsp. flour or cornstarch
1 tsp. cinnamon
2 Tbsp. butter
2 pie crusts (to make one double crust pie)
1 Tbsp. sugar for topping

Preheat your oven to 400.  Roll out first pie crust and place in bottom of pie pan, trimming edges as needed.  Place the fruit in a colander for 15 min. to drain any excess liquid.  Transfer to a bowl and toss with sugar, flour or cornstarch, and cinnamon.  Fill pie crust, dot with 2 Tbsp. butter and top with second crust.  Flute edges as desired and be sure to cut a few vents in the top to allow steam to escape.  Sprinkle 1 Tbsp. sugar over crust and bake for 45 mins.  Keep an eye on the crust.  You may need to cover the edges with a strip of aluminum foil to keep them from overcooking.

Friday, June 15, 2012

3 Ingredient Peanut Butter Cookies

My friend Katie made these cookies the other day when we got our kids together for a play date.  Now, I've never liked peanut butter cookies.  They always seemed dry and almost a bit burnt tasting to me.  I always want them to be creamy and rich- like peanut butter is!  These cookies, however, are nothing like those dry cardboard cookies I remember.  They are soft, chewy, silky smooth and peanutty.  I asked her for the recipe and was so surprised at how easy they are!  Only 3 ingredients!! I made a batch at home and they only lasted a couple of days.  I simply could not stop eating them!  I'm pretty sure you could make them with any nut butter, and next time I'm going to try it with Nutella.  I'm sure they'll be TO DIE FOR!


1 c. peanut butter
1 c. sugar
1 egg

Preheat oven to 375 degrees.  Mix ingredients together in a bowl.  Roll into 1-2 inch balls.  Place balls on a cookie sheet and use a fork to press a criss-cross pattern in the center of each cookie, flattening them into disks.  Bake for 8-10 mins watching them carefully!  They burn easily and there is a very fine line between raw, done, and overdone.  IMPORTANT:  Leave them on the cookie sheet a full 10 mins. before removing to let them cool or you will have peanut butter crumbs.  Once they are cool, eat with reckless abandon. :)

Monday, June 11, 2012

A Birthday

Hi!  I'm back! Man, what a crazy crazy start to summer it's been around here.  We've had guest after guest from all corners of the country, the end of the school year, internships, projects, swimming lessons, summer reading, 5ks,  etc, etc, etc.  But, I am attempting to get back to my blog, as hard as it is to be inside on the computer when it's sunny out :)

The biggest event of the past few weeks was my daughter's 4th birthday party.  Her special day fell on Memorial Day this year, so we had a combo party and bbq.  It was a lot of fun!  We set up the badminton net, had good eats and brews and even some yummy girly drinks courtesy of my friend Tara!  Thanks Tara!  And Tara, my next post will have that potato salad recipe, just for you!


My beautiful birthday girl!

She got some new wheels!


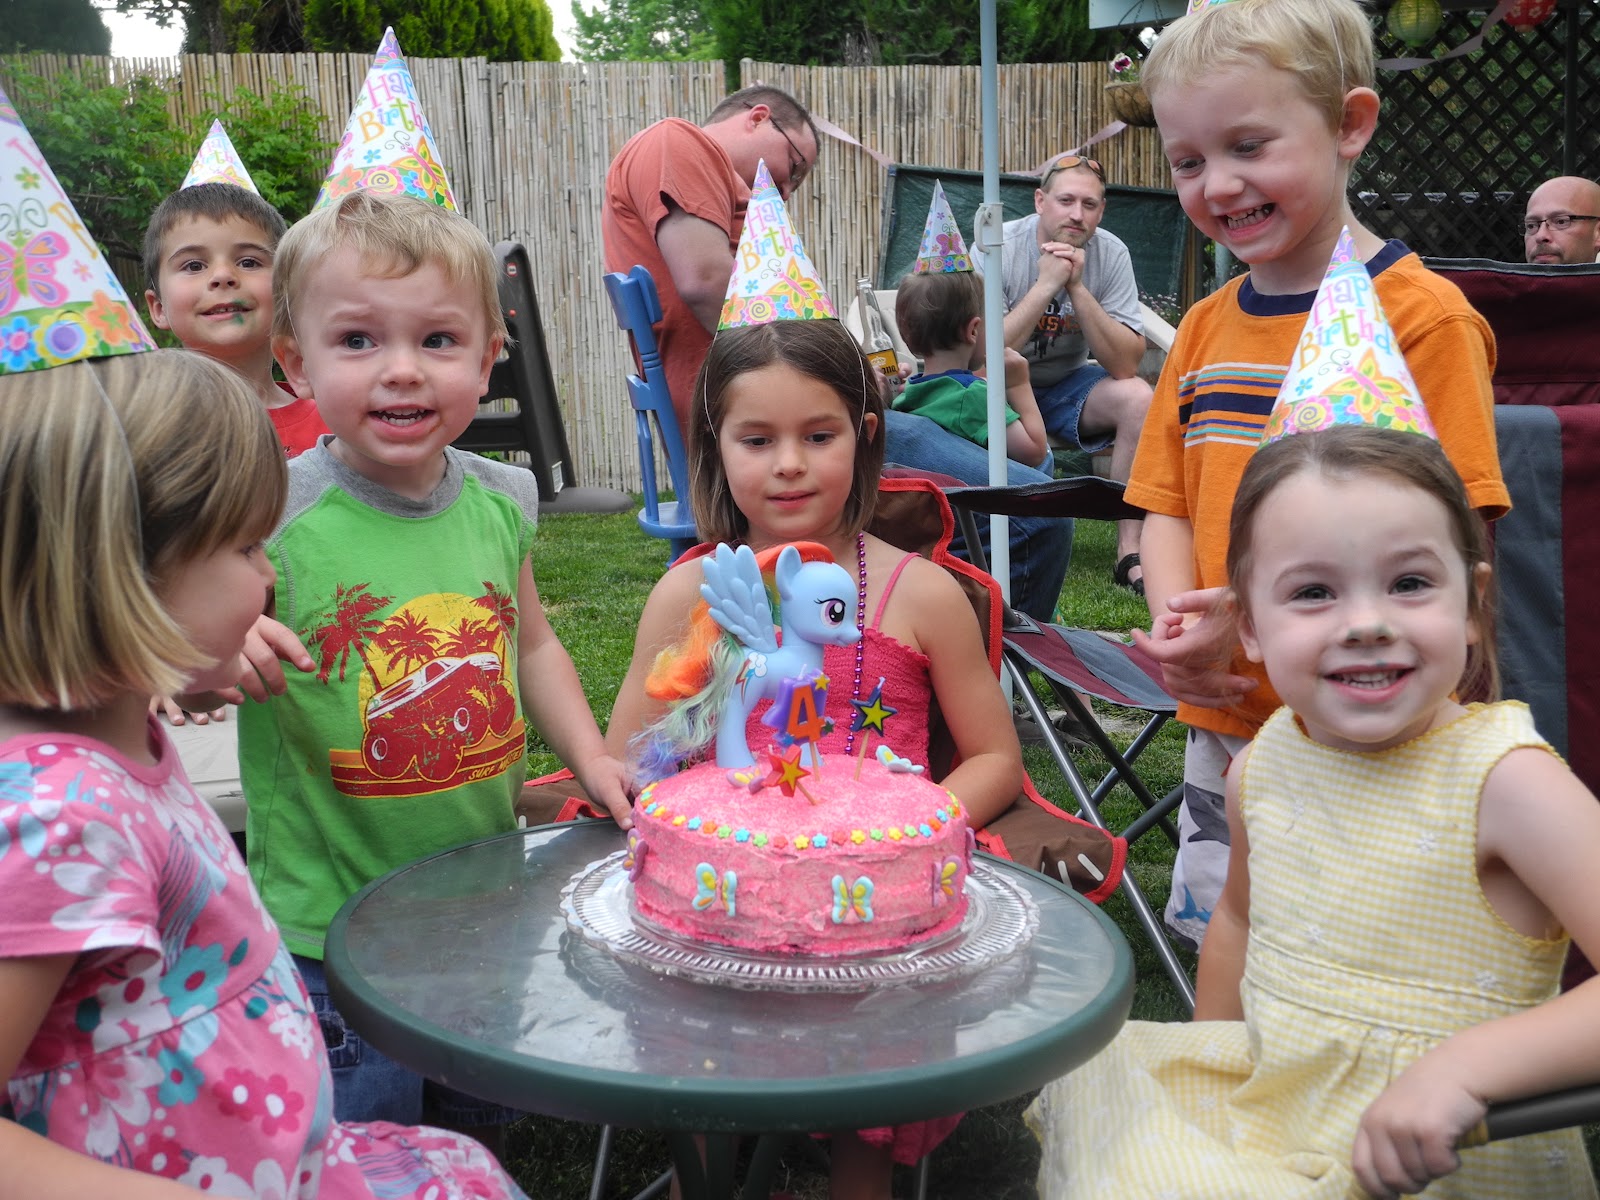
Here's a pic of Big Sister's "My Little Pony" cake. This was the easiest birthday cake I've created so far and she loved it! It was chocolate strawberry and we just barely had enough for everyone! Phew!


It was so simple to make.  I took a basic chocolate cake recipe, or you could use a cake mix, and cooked it in two round cake pans.  Once they were totally cooled I spread the bottom layer with strawberry jam before adding the top layer.  I like doing this with layered cakes rather than using frosting.  It cuts the sweetness a bit and gives it an extra little something.  Then I frosted with strawberry flavored frosting in a can, which my daughter begged for!  Then I sprinkled the entire cake with pink sugar crystals and decorated with these adorable 3d edible butterflies and flowers that I found at a craft store (Hobby Lobby??)  Then we added her favorite pony, "Rainbow Dash" (favorite because she's a PEGASUS!!!) and finished it off with candles.  I tell you what, making a themed cake this way by sticking a toy on top is soooo much easier than the purple dinosaur and green alligator with babies I made last year for their birthdays:


You can find directions for the crocodile cakes at here.  To make the cupcakes we just frosted them with the same green frosting, cut the apple rings in half and added smaller versions of the marshmallow eyes.
I love making fun cakes for my kids' birthdays.  They are fun, creative, challenging at times, and best part-the kids love them.  I love that something as simple as a birthday cake can be such a labor of love, a real gift from the heart.  Making food that makes people smile and creates memories is why I love to cook!


Friday, May 18, 2012

Dark Chocolate Cherry Brownies

I know you can't tell by the title of this post, but I've been really kicking up my healthy habits lately.  I've cut caffeine almost entirely out of my diet, along with the cream and sugar that goes with it.  I've been devouring fruit and whole grains, cutting more meat out of my diet and trying to stay away from sweets.  I'm also back into a regular exercise habit, working out about 5 days a week, either running or yoga.  I'm feeling great, sleeping wonderfuly and feeling much more even-keel emotionally since I said bye bye, caffeine.  

So, you can imagine my surprise when I stepped on the scale the other day and had GAINED 3 lbs.  Now of course, I'd like to think that I gained 3 lbs of muscle in the past few weeks, but I just don't know if I believe that.  I thought, maybe I'm just bloated...

2 days later, the number when up another half a pound.  What the hey!?  Now, I know a 3 lb. gain is not that big of a deal, and I don't want to come across as one of those women that obsesses about their weight, because I really don't.  If I feel good, work out and eat well I figure my body will find the place it needs to be to work optimally.  It is a bit of a bummer though to see those numbers creep up when you expect them to go down.  So, what's a girl to do?  Make brownies, of course!  Now I know this doesn't make any sense at all, but I've learned in the past that if I gain a bit and then OBSESS trying to lose it I am miserable and don't lose an ounce.  If I just say, oh well, and continue my healthy habits I always end up back where I need to be without all the stress and guilt.  So, yes.  I want to lose weight.  I am eating brownies. :)


This particular recipe comes from Baking Obsession and I like it not only because it is delicious, but also as far as desserts go it's got a lot going for it health wise.  Walnuts are a terrific source of heart-healthy fats and dark chocolate and cherries are both high in antioxidants.  Add that to the mood boost you get from eating delicious food that you made yourself, and what could be better?


6 tbsp (3/4 stick) butter, salted or unsalted
8 oz bittersweet or semisweet chocolate, chopped
¾ cup sugar
1 tsp pure vanilla extract
2 large eggs
¼ cup flour
¼ tsp salt
1 cup toasted and chopped walnuts (or other nuts)
1/3 cup dry cherries, chopped
1/3 cup dark chocolate chips


Preheat the oven to 350 degrees. Butter a 9-inch square cake pan and line the bottom with parchment paper.

Melt the butter in a medium-size saucepan. Add the chocolate to the butter, stir over low heat until melted.Remove from the heat and stir in the sugar and vanilla. Beat in the eggs, one at a time.

Add the flour, and salt and stir energetically for 1 minute, until the batter loses its graininess and becomes smooth and glossy.  (*This is an important step, unlike most brownies you need to really incorporate these ingredients.)

Stir in the chopped nuts, cherries, and the chocolate chips. Scrape the batter into the prepared cake pan and bake for 30 minutes. Cool completely before removing the brownies from the pan.

The brownies will keep well for up to 4 days (though  I'd never know....) at room temperature.

Saturday, May 12, 2012

Buttermilk Pound Cake

Since it's strawberry season we've been eating a lot of strawberry shortcake around here.  We like to have it on angelfood cake or pound cake rather than those little round storebought shortcakes.  I think those just have a gross texture and taste like chemicals.  This cake is so easy to whip up.   It makes a lot and freezes well.  I like to slice it all up the day I make it and freeze it in ziploc bags.  Whenever you want strawberry shortcake, just pull a slice out and let it thaw for 30 mins or so.  Delish!


3 cups all-purpose flour
1/4 teaspoon baking soda
1/2 teaspoon salt
1 cup butter
3 cups white sugar
6 eggs
1 teaspoon lemon extract
1 teaspoon vanilla extract
1 cup buttermilk

Preheat oven to 325.  Grease one 9 or 10 inch tube or bundt pan. Mix together the flour, baking soda, and salt. Set aside.

In a large bowl, beat butter with sugar. Mix in the eggs, one at time, beating well after each addition. Stir in the lemon and the vanilla extracts. Gently mix in flour mixture alternately with the buttermilk. Pour batter into the prepared pan.               

Bake in preheated oven for 90 minutes. Do not open oven door until after one hour. When cake begins to pull away from the side of the pan it is done. Let cool in pan for 10 minutes, then turn out onto a wire rack and cool completely.

Saturday, April 28, 2012

Über Moist Banana Bread

This is by far my absolute favorite banana bread recipe.  There are two things that make this bread unique.  First, it has sour cream in it which gives it an extra dose of richness and moisture.  Second, the bananas are sliced so you get these big bursts of creamy banana goodness.  I use pecans or walnuts, depending on what I have.  Lately I've been making individual sized "loaves" using 2 muffin tins.  These are just the right size for my kids to have for a snack.  I sprinkle the nuts on top rather than mixing into the batter which makes them look pretty and is easy for my daughter to pick off. :)

1/2 c. butter, melted
1 c. white sugar
2 eggs
1 teaspoon vanilla extract
1 1/2 c. all-purpose flour
1 tsp. baking soda
1/2 tsp. salt
1/2 c. sour cream
1/2 c. chopped pecans
2 medium bananas, sliced

Preheat oven to 350 degrees.  Grease a 9x5 inch loaf pan, mini loaf pan (4 loaves) or 2 muffin tins.

In a large bowl, stir together the melted butter and sugar. Add the eggs and vanilla, mix well. Combine the flour, baking soda and salt, stir into the butter mixture until smooth. Finally, fold in the sour cream, walnuts and bananas. Spread evenly into the prepared pan.

Bake for 60 minutes for a large loaf, 30-40 for mini loaves or 20-25 mins. for muffins.  Do the toothpick test to see if they are done for sure. Cool loaf in the pan for 10 minutes before removing to a wire rack to cool completely.

Saturday, April 21, 2012

Strawberry Jam Bars

My husband is a science teacher at our high school in town and was asked by the drama class to help out with their production of Usher a comedic adaptation of Edgar Allen Poe's works. 


He agreed and was assigned to play the character "The Mask of the Red Death".  He had 3 lines, served as announcer, did the thunder sound effects and got to wear his favorite Halloween costume.  He had an absolute blast working with the kids, getting to know many of them in new ways.  He really loves what he does and loved getting to spend some extracurricular time with the students. 

After their last performance they had a cast party and I sent him with these yummy bars.  They were a big hit.  I try to not bake with pre-packaged ingredients very often, but I was told that cookies were really good and so I decided to try them out.  They are pretty sweet, but that seemed to be just what the doctor ordered for the high school crowd.  I like that they are a fruity bar rather than laden with chocolate and caramel.  Don't get me wrong, I love an ooey gooey bar cookie as much as the next gal, but sometimes it's nice to have something with fresher flavors.  You could easily make these with any flavor of jam, or even an apple butter might be good!


1/2 c. butter, softened
1/2 c. packed brown sugar
1 egg
1 package white cake mix
1 cup finely crushed cornflakes
1 c. strawberry jam, or flavor of your choice

In a large bowl, cream butter and brown sugar until smooth. Add egg; mix well. Gradually add dry cake mix and cornflakes. Set aside 1-1/2 cups for topping. Press remaining dough into a greased 13-in. x 9-in. baking pan.

Carefully spread jam over crust. Sprinkle with reserved dough; gently press down. Bake at 350° for 30 minutes or until golden brown. Cool completely on a wire rack. Cut into 24 bars

Tuesday, April 17, 2012

Limoncello Cake

I found this gem of a dessert on allrecipes.com.  It is light and refreshing, a perfect finish to a heavy Italian meal or on a hot summer day.


  • 1 cup plain yogurt
  • 2 eggs
  • 1/3 cup canola oil
  • 2 Tbsp. lemon juice
  • 2 tablespoons lemon zest
  • 1 c. sugar
  • 1/4 cup limoncello liqueur
  • 2 cups all-purpose flour
  • 1 1/2 teaspoons baking powder
  • 1/2 tsp. baking soda
  • 1 pinch salt (optional)
  • 3/4 cup confectioners' sugar
  • 3 tablespoons limoncello liqueur


  • Preheat oven to 350 degrees F (175 degrees C). Prepare an 8-inch cake pan with cooking spray.               

    Whisk together the yogurt, eggs, canola oil, lemon juice, lemon zest, sugar, and 4 tablespoons limoncello in a large bowl. In a separate large bowl, mix the flour, baking powder, baking soda, and salt. Gently stir the dry ingredients into the wet. Do not over mix or the cake will be tough. Pour batter into prepared pan.            

    Bake in the preheated oven until top is golden and a toothpick inserted in the center of the cake comes out clean, about 35 minutes. Remove from oven and allow to cool slightly.

    Stir the powdered sugar and 3 tablespoons of limoncello together in a small bowl until smooth. Poke small holes all over the top of the still-warm cake with a fork or toothpick. Spoon the glaze over the cake and spread with the back of a spoon. The glaze will seep into the cake and add moisture.                

    Friday, March 16, 2012

    Great Aunt Tommie's Hot Water Chocolate Cake

    There are chocolate cakes and then there are chocolate cakes.  This chocolate cake recipe is rich and almost brownie like in texture with frosting that has the consistency of fudge (please oh please don't disgrace this cake with store-bought frosting!).  This cake screams for a tall glass of milk to go with it. 

    The recipe comes from my great aunt, Tommie.  A southern cook extraordinaire she was well known in the family for her amazing dishes.  If she was alive today I think she'd give Paula Deen a run for her money.  In addition to being a tremendous cook, she was also known for being quite a beauty.  My mom always said she reminded her of Elizabeth Taylor.  I never met her myself, or was too young to remember, but the cake is a part of some of my earliest childhood memories.  It served as many a birthday cake and special treat when the family would get together over the years. 

    Tommie and a calf, 1935


    Oh, and don't forget about my handwarmer mug giveaway!  Drawing will be on April 2.  See the Masala Chai post, two below this one for instructions to enter.  And remember to "like" Naloma Kitchen at www.facebook.com/nalomakitchen.  :)
    Cake:
    2 c. sugar
    2 c. flour
    1/2 c. vegetable oil
    1 stick butter
    2 eggs
    1 c. water
    4 Tbsp. cocoa
    1/2 c. buttermilk
    1 tsp. baking soda

    Frosting:
    1 stick butter
    6 Tbsp. milk
    1 tsp. vanilla extract
    1 c. chopped walnuts or pecans
    4 Tbsp. cocoa
    1 lb. powdered sugar

    Preheat oven to 400 degrees.  To prepare the cake, sift the sugar and flour together in a large bowl.  In a medium sized sauce pan bring the water, oil, butter and cocoa to a boil.  Beat this mixture into the flour and sugar till well combined.  Then add the buttermilk, baking soda and eggs.  The batter will seem a bit runny compared to regular cake batter.  Pour into a greased 9x13 pan and bake for 20-25 min. until it passes the toothpick test.

    When cake is cool, prepare the frosting.  Bring the milk, butter and cocoa to a boil.  Mix in the powdered sugar, vanilla and uts.  Pour over the cake while still hot and spread to cover.  Let the frosting cool completely before cutting.  Store covered in the refridgerator.

    Monday, February 27, 2012

    Blueberry Lemon Shortbread


    I had a major urge to bake something yesterday purely just to have something to do, but I had no desire to get out of my jammies and head to the store, so I dug through my cook books and found a recipe for raspberry lemon bars that I adapted using what I had on hand.  It made a large pan so I wrapped up half of them and brought them by the high school where my husband teaches for his coworkers to snack on during the day.  It makes me feel so good to share some homemade goodness when people least expect it...and it keeps me from eating all of it!  Of course, Little Brother had to sample them first to make sure they were good :)


    1 c. butter, softened
    1/4 c. powdered sugar
    2 c. flour
    4 eggs
    1 1/2 c. granulated sugar
    1/3 c. lemon juice
    1 Tbsp. lemon zest
    1/4 c. flour
    1 tsp. baking powder
    1 1/2 c. blueberries (I used frozen that I thawed ahead of time)
    powdered sugar for dusting

    Preheat oven to 350.  For the shortbread crust, beat butter with an electric mixer for about 30 seconds.  Add the 3/4 c. powdered sugar and beat until combined.  Add the 2 cups flour and beat until well mixed.  Press mixture into the bottom of a greased 9x13 pan.  Bake for 20 min. until golden.

    Meanwhile make the filling:  Combine eggs, granulated sugar, lemon juice, zest, 1/4 c. flour and baking powder in large mixing bowl.  Beat for 2 min. with electric mixer till combined.  When crust comes out of oven, sprinkle berries over the top then carefully pour the filling over that.  Arrange berries evenly with a spoon if they moved around on you.

    Put back into the oven and bake another 30-35 mins. until light brown and filling has set.  Cut into bars.  Just before serving dust with powdered sugar. 

    These don't keep long- keep them covered in the fridge for up to 2 days.  Or you can cut and freeze them up to 1 month.  Thaw in the refridgerator.  I don't think you'll have to worry about them going long.  I'd be surprised if they lasted 2 days anywhere!


    Thursday, February 23, 2012

    Pineapple Pecan Upside Down Cake

    Yesterday was my husband's birthday and every year he requests this cake.  It is his mom's recipe that he grew up eating and it is sooo delicious!  You can leave out the nuts if you like, but I think they make this cake.  I add maraschino cherries to spruce it up a bit, but you could always just use more nuts.


    1/2 c. butter
    1 c. brown sugar
    1 large can pineaple slices, reserve the juice
    1 c. flour
    1 tsp. baking powder
    1/8 tsp. salt
    3 eggs, separated
    1 c. white sugar
    5 Tbsp. pineapple juice
    pecans and maraschino cherries

    Preheat oven to 375 degrees.  Put the butter in the bottom of a deep cast iron skillet or frying pan (cast iron seems to make the best caramely goodness on the top of the cake) and put in the oven while it preheats to melt the butter.  When it is completely melted, sprinkle the brown sugar evenly over the top.  Then arrange the pineapple slices, filling in spaces with nuts and the cirles in the rings with cherries. 

    Mix flour, salt and baking powder together in a small bowl and set aside. 

    In a large bowl beat the egg yolks and white sugar together until creamy.  Then add pineapple juice.  Add dry ingredients to wet and mix well.  Then beat the egg whites in another bowl until stiff peaks form.  Gently fold the whites into the batter.  Pour batter over the pineapple rings.  Bake for 30-35 min. until a toothpick inserted in the center comes out clean. 

    Run a knife around the edge of the cake and quickly invert onto a serving platter.  It's easiest to put the platter upside down on the pan and then hold them together as you flip the whole set up over.  Let it cool before serving.

    Wednesday, February 15, 2012

    Double Chocolate Brownies

    Brownies are by far my favorite baked good.  Is there really anything better than the ooey-gooey goodness of a fresh brownie?  I think not. 


    1 c. melted butter
    3 c. white sugar
    1 Tbsp. vanilla extract
    4 eggs
    1 1/2 c. flour
    1 c. cocoa
    1 tsp. salt
    1 c. chocolate chips, whatever kind you like

    Grease a 9x13 pan and preheat your oven to 350.   Mix the butter, sugar and vanilla together well.  Beat in the eggs 1 at a time, mixing well after each addition.  Sift the flour, cocoa and salt together.  Then gradually add it to the wet ingredients.  Once that is mixed in well you can add the chocolate chips.  Spread in your prepared pan and bake 35-40 mins.  Cool completely in the pan before cutting or they will fall apart on you.  

    Sunday, February 5, 2012

    Jam Thumbprints

    I had some left over currant jam from making the Sweet & Tangy Cocktail Weenies a few weeks ago.  Currant jam on its own isn't a big hit in this house so I decided to use it to make some jam thumbprint cookies I'd been craving ever since someone brought them to our holiday cookie exchange party.  You can really use any kind of jam that you like in this recipe.  I forgot to take a pic before they were all eaten up, so I borrowed this one from Sunset Magazine, but the recipe is mine.  :)  I also dusted mine with powdered sugar.  I think it makes them look so much prettier!


    1 c. butter
    1/2 c. powdered sugar
    2 tsp. vanilla extract
    2 c. all-purpose flour
    1/4 tsp. salt
    1/2 c. fruit preserves or jam


    Preheat oven to 325 degrees.  Cream the butter and sugar together with an electric mixer.  Add vanilla, then flour and salt, mixing till well combined.

    Roll tablespoons of dough between your hands to form balls and place on a greased cookie sheet.  Use your thumb, a small spoon (I used the teaspoon in my measuring spoon set), or the round end ofa wooden spoon to create a depression in the center of each cookie.  Make sure not to poke all the way through the dough to the cookie sheet or your jam will all run out!

    Fill each depression with jam.  Bake 15-20 min. until golden brown.  Immediately transfer to a cool flat  surface, NOT A COOLING RACK! When they are completely cooled, dust them lightly with powdered sugar. 

    Yield 2 dozen.
    

    Monday, January 23, 2012

    Maple Butterscotch Blondies

    My husband LOVES butterscotch so the kids and I whipped up these blondies just for him! ♥  They are gooey and rich, a perfect fix for your sweet tooth.  My kids don't like nuts so I left those out, but I think they'd be delicious!


    1/2 c. melted butter
    1 1/4 c. packed brown sugar
    2 eggs
    1 1/2 tsp. maple syrup
    1 1/2 c. flour
    1 tsp. baking powder
    1 c. butterscotch chips
    1/2 c. chopped walnuts (optional)

    Preheat your oven to 350.  Cream the butter and brown sugar together in a large bowl.  Add the eggs, beating well till blended.  Then beat in maple syrup.  In another bowl combine the flour and baking powder.  Add to egg mixture and mix well.  Fold in butterscotch chips and walnuts if you are using them. 

    Pour into a greased 9" square baking pan (I LOVE Baker's Joy spray!)  Bake for 27-32 minutes or until a toothpic inserted near the center comes out clean.  Let cool completely before cutting.

    Friday, January 6, 2012

    Award Winning Chocolate Chip Cookies

    My mom gave me this recipe quite a few years ago and it has become my favorite go-to cookie recipe when the kids and I need a sweet fix.  The secret ingredient is pudding mix.  It keeps the cookies soft and chewy.  The original recipe called for vanilla pudding and regular chocolate chips, but I decided to mix it up at use chocolate pudding mix and white chocolate chips because it's what I had on hand and they were so good I might make them this way all the time! 


    The kids love to help me bake, and are great about taking turns running the mixer.  Big Sister has an aversion to clothing and hair brushing these days, which is why she looks like she's being raised by wolves!  I really do bathe them! :)

    We decided to send a dozen of these to their gramma for her birthday. She'll be so excited!

    2-1/4 cups all-purpose flour
    1 teaspoon baking soda
    1 cup butter, softened
    3/4 cup packed brown sugar
    1/4 cup white sugar
    1 (3.4 ounce) package instant chocolate pudding mix
    2 eggs
    1 teaspoon vanilla extract
    2 cups white chocolate chips
    1 cup chopped walnuts (optional)

    Preheat oven to 350 degrees F (175 degrees C). Sift together the flour and baking soda, set aside.

    In a large bowl, cream together the butter, brown sugar, and white sugar. Beat in the instant pudding mix until blended. Stir in the eggs and vanilla. Blend in the flour mixture. Finally, stir in the chocolate chips and nuts. Drop cookies by rounded spoonfuls onto ungreased cookie sheets.               

    Bake for 10 to 12 minutes in the preheated oven. Edges should be just barely golden.               

    Other pudding/chip combos to try:

    Butterscotch chips & pudding
    Vanilla pudding w/ semi-sweet chocolate chips
    Pistachio pudding w/ pistachios
    Chocolate pudding w/ mint or peanut butter chips.

    Feel free to play around with the flavor combinations.  I'd love to hear what other combos you come up with!


    Monday, January 2, 2012

    Dawn's Divine Caramel Corn

    A good friend, fellow teacher and yoga student of mine makes this absolutely delectable caramel corn.  It is soft and chewy, and you just can't stop eating it.  I hope you give it a try!


    3 bags of microwave popcorn, popped
    2/3 c. sugar
    2/3 c. brown sugar
    1/2 c. light corn syrup
    2 sticks of butter, cubed
    1/2 tsp. baking powder
    1/2 tsp. vanilla extract

    Put popcorn in a large bowl, taking care to remove all unpopped kernels. Spread out a large sheet of waxed paper or aluminum foil. Melt sugar, brown sugar and corn syrup together in a saucepan over med-high heat until just boiling. Add butter and bring to a boil, stirring constantly. Once it is boiling, continue to stir and boil for 3 mins. The butter will begin to incorporate as it boils. After 3 min. remove from heat and add vanilla and baking powder. Mixture will foam up.  Don't worry, this is normal. Pour caramel over popcorn, stirring to coat. Spread caramel corn onto waxed paper or foil to cool. Serves 8
    Related Posts Plugin for WordPress, Blogger...